
How to Sequence Home Improvement Projects Effectively

Starting a renovation without a clear sequence is one of the fastest ways to blow your budget and your timeline. Homeowners who try to sequence home improvement projects effectively for the first time often discover that skipping one step forces them to undo work they already paid for. Over 35% of budget overruns result directly from poor sequencing, not bad contractors or bad luck. This guide walks you through exactly how to plan, order, and complete home improvement tasks so you spend less, stress less, and finish with results you are proud of.
Table of Contents
Key takeaways
Point | Details |
Sequence drives budget control | Poor task order causes costly rework; the right sequence protects your money from the first day. |
Permits come before any physical work | Skipping permit planning risks stop-work orders, fines, and forced demolition of completed work. |
Order materials before breaking ground | Long-lead items like cabinets and windows have 8 to 14 week lead times and must be ordered early. |
Build buffer time into your schedule | Adding 10 to 20% extra time to your schedule prevents one delay from stalling your entire project. |
Structural and mechanical work comes first | Rough-in plumbing, electrical, and HVAC must be completed and inspected before any walls close up. |
How to sequence home improvement projects effectively from day one
Effective home renovation planning starts long before anyone picks up a tool. The biggest mistake homeowners make is treating planning as a formality rather than as the real work. You are essentially building a dependency map: every task either unlocks or blocks something else.
Start by dividing your project into three buckets. Needs are repairs that affect safety or function, such as a leaking roof or faulty wiring. Wants are upgrades that improve livability, like a kitchen refresh. Wishes are the aspirational additions you will tackle if the budget allows. This categorization keeps you from spending money on aesthetics while structural problems wait.
Budgeting comes next. A 10 to 25% contingency fund is the industry standard, and for good reason. Older homes routinely hide outdated wiring, water damage, and undersized framing behind their walls. Without a contingency, the first surprise stops your project cold.
Here is a preparation checklist to run through before any work begins:
Confirm the full project scope in writing, including all rooms and systems affected
Set a firm budget with contingency funds built in
Research local permit requirements for your specific project type
Interview and select all contractors before scheduling any work
Identify every long-lead item (cabinets, windows, custom tile, specialty fixtures)
Submit permit applications as early as possible
Permit approvals can take 4 to 6 weeks or longer depending on your municipality, and complex structural or mechanical projects may require 6 to 12 months of lead time. Applying early is not just smart planning. It is what separates projects that finish on time from those that stall out halfway through.
Pro Tip: Order long-lead items the same week you submit your permit application. Cabinets, windows, and specialty tile commonly carry 8 to 14 week lead times. Ordering early means your materials arrive right when your contractors need them, not two weeks after.
Preparation task | Why it matters |
Scope definition | Prevents scope creep and unplanned spending |
Permit application | Avoids stop-work orders and legal liability |
Contingency budgeting | Covers surprises without stopping work |
Long-lead ordering | Keeps contractors on schedule |
Contractor selection | Avoids scrambling mid-project for trades |
The right order for tackling home improvement tasks
This is where effective DIY project sequencing pays off in real dollars. The correct order of operations protects your work at every stage. Doing tasks out of order means redoing them, and that costs money, time, and morale.
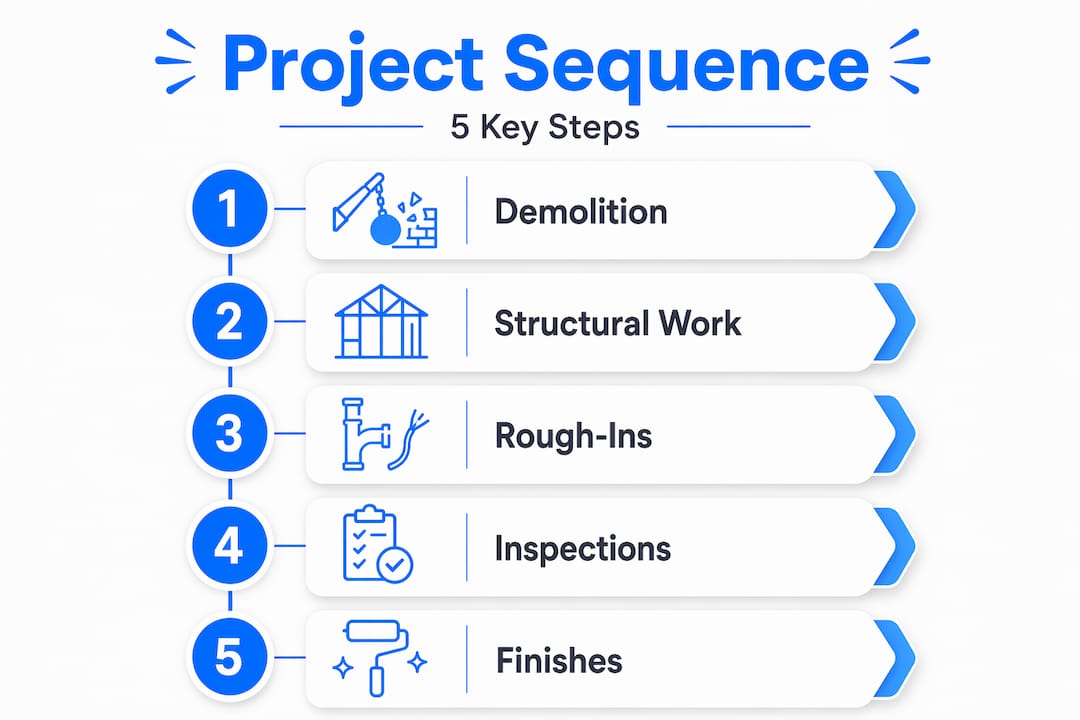
Here is the proven sequence that professional renovation crews follow:
Demolition. Remove everything that is being replaced. Doing demo first gives you a clear view of what is behind the walls and lets structural problems surface early, before you have paid for finishes.
Structural work. Address framing, load-bearing changes, foundation repairs, and roof work before anything else goes in. Timely structural repairs prevent far more expensive problems down the road.
Mechanical rough-ins. Run all electrical, plumbing, and HVAC before walls are closed. This is the phase where pipes, wires, and ductwork get placed inside the wall and ceiling cavities.
Inspections. Inspections occur after framing, electrical rough-in, and plumbing rough-in, and again at final completion. Schedule each one as soon as the work is ready. Waiting on inspections is one of the most common causes of idle contractor time.
Insulation and drywall. Only after inspections pass. Closing walls before an inspection means opening them back up at your expense.
Painting and priming. Paint the walls and ceilings before any trim, cabinetry, or flooring goes in. This protects finished surfaces and speeds up the painting process.
Cabinetry, trim, and millwork. Install after paint, before flooring. Cabinets and trim can scratch flooring during installation, so this order protects your investment.
Flooring. One of the last major installations. Hard flooring, tile, and carpet all go in after walls, paint, and cabinetry are done.
Final fixtures and punch list. Hang light fixtures, install hardware, set toilets and faucets, and walk through a detailed punch list before making any final payments.
Getting this order wrong is expensive. Incorrect sequencing in a kitchen remodel can add $2,000 to $6,000 or more in rework costs. A common example: homeowners who install new flooring before drywall is complete end up with dust, debris, and tool traffic destroying a floor they already paid for.
Pro Tip: Build inspection scheduling into your project calendar from day one. Milestone approvals and inspections should appear on your timeline as fixed dates, not afterthoughts. This prevents every trade from sitting idle while you wait for a passed inspection.
Coordinating multiple subcontractors
When you are working with plumbers, electricians, and HVAC techs at the same time, scheduling becomes its own job. Give each contractor a written schedule with their expected start date, the inspection they are working toward, and the date by which their phase must be complete. When each trade knows the deadline clearly, they plan accordingly and do not show up when another crew is still working.

Managing setbacks without losing your timeline
No renovation goes exactly as planned. About 25% of renovation delays come from tasks that were completed out of sequence. The rest come from the surprises every homeowner eventually faces: a failed inspection, a backordered material, or an unexpected structural issue behind the drywall.
The solution is to build buffers in before anything goes wrong. Experts recommend adding 10 to 20% extra time to your overall schedule as a cushion. For a project you expect to take ten weeks, plan for eleven or twelve. If everything goes smoothly, you finish early. If something goes sideways, you absorb it without panic.
Here are the most common setbacks and how to handle each one:
Inspection delays. If an inspector flags an issue, get the correction done within 48 hours and request the re-inspection immediately. Every day you wait is another day your project idles.
Material backorders. Track the lead time for every major item and build in a two-week buffer beyond the manufacturer estimate. Suppliers often miss their own promised dates.
Surprise discoveries during demolition. When you open a wall and find mold, asbestos, or outdated knob-and-tube wiring, stop work on that area and get professional assessments before proceeding. Guessing is how small problems become expensive ones.
Subcontractor no-shows. Always have a backup contact for each trade. In a busy construction market, you cannot afford to wait two weeks for a replacement electrician before your drywall can go up.
Pro Tip: Set milestone checkpoints at the end of each major phase, not just at the start and finish of the whole project. Catching a three-day slip at the end of week two is manageable. Discovering a three-week delay at the end of week eight is a crisis.
Regular check-ins matter too. A ten-minute daily walkthrough of active work areas lets you catch problems before they grow. You do not need to micromanage your contractors. You need to stay informed enough to make fast decisions when the unexpected happens.
Finishing strong and closing out your project
The final phase of any renovation is where details get sloppy if you are not deliberate. Most homeowners are exhausted by this point and rush through finishes, which leads to touch-ups, disputes over payment, and missed warranty registrations.
Follow this order to finish right:
Complete all painting and touch-ups before any flooring or fixtures are finalized.
Install flooring in the correct order: subfloor repairs first, then underlayment, then finished flooring material.
Verify the roof restoration and exterior work before closing out any weatherproofing-related permits.
Walk every room with a written punch list. Write down every incomplete item, every paint scuff, every fixture that does not sit flush.
Schedule your final inspection and do not release final payment until you have a passed inspection certificate in hand.
Collect all warranty documentation, permit records, and contractor invoices. Store them together in a folder you will keep long term. These records matter when you sell the home or make an insurance claim.
A proper project close-out also means reconciling your budget. Compare what you spent against what you planned, line by line. This is not just an accounting exercise. It tells you exactly where your estimates were accurate and where they missed, which makes you a smarter planner for the next project.
What I have learned from sequencing hundreds of home projects
I have watched homeowners lose weeks and thousands of dollars from a single mistake: treating permits as an afterthought. Permitting should never be an afterthought. It is not bureaucratic red tape. It is the legal backbone of your project. Skipping permits risks stop-work orders, fines, and forced demolition of finished work, which is the kind of setback that breaks renovation budgets completely.
The other mistake I see repeatedly is locking in design decisions too late. When a homeowner changes their tile selection after the order is placed, that ripples through the whole schedule. It delays the flooring crew, pushes the punch list back two weeks, and sometimes adds penalty fees from the supplier. Lock in every design decision before you pull a permit.
Balancing DIY work with professional help is also something homeowners consistently underestimate. Painting? Do it yourself if you have the time and patience. Electrical rough-in? Hire a licensed electrician, every time. The cost difference rarely justifies the risk, and a failed rough-in inspection sets your whole schedule back, not just the electrical phase.
The homeowners I have seen come out ahead are the ones who treated the plan as seriously as the construction. They built their contingency fund, ordered materials early, and kept their contractors accountable to a written schedule. Every one of those habits is learnable. None of them require construction experience. They just require discipline.
— Ricco
Ready to get your project done right?
Planning a home renovation is one thing. Executing it without costly missteps is another. Manycolorswi brings experienced, trained crews to residential and commercial projects across Milwaukee, handling everything from flooring and drywall to painting and lawn care. The team at Many Colors understands project sequencing because they live it on every job.

Whether you need a single room refreshed or a full renovation managed from start to finish, Manycolorswi can help you plan the right sequence, source materials, and keep your project moving. Reach out today to talk through your project and get a clear picture of what it takes to do it right.
FAQ
What is the correct sequence for home improvement tasks?
The standard order is demolition, structural work, mechanical rough-ins (electrical, plumbing, HVAC), inspections, insulation and drywall, painting, cabinetry and trim, flooring, and final fixtures. Following this renovation task sequence prevents costly rework.
How much contingency budget should I set aside?
Plan for 10 to 25% above your estimated project cost. Older homes especially tend to hide water damage and outdated systems that only reveal themselves once demolition begins.
When should I apply for renovation permits?
Apply for permits as early as possible, ideally before ordering materials or scheduling contractors. Permit approval can take 4 to 6 weeks and sometimes longer, so early applications prevent unnecessary project delays.
Why does sequencing matter so much for budgets?
Poor sequencing forces rework, which adds direct labor and material costs. In kitchen remodels alone, doing tasks out of order can add $2,000 to $6,000 in avoidable expenses. Correct sequencing is how you stay on budget.
How do I handle unexpected discoveries during demolition?
Stop work in the affected area immediately, get a professional assessment, and update your contingency budget and timeline before proceeding. Trying to work around surprises without proper evaluation leads to larger and more expensive problems later.
Recommended
Comments